
How to Install Concrete Paving Slabs
If you have made the decision to install paving slabs yourself, there are a number of things you need to prepare and some important steps to follow to ensure your patio paving looks good and performs well for many years, letting you get the maximum enjoyment from your outdoor space.
We’ve put together some use tips and advice on how to lay paving slabs – follow these and you can’t go wrong.
Check List
Before you start to install your paving, make sure you have everything you need. Below is a list of tools and materials you will need.
Spade, rake, broom, rubber mallet, spirit level, string line, tape measure, pointing trowel, cutting tool (e.g. disc cutter), cement mixer (not essential) and compactor (mechanical if possible), wheelbarrow and some personal protection equipment such as gloves, glasses and protective footwear.
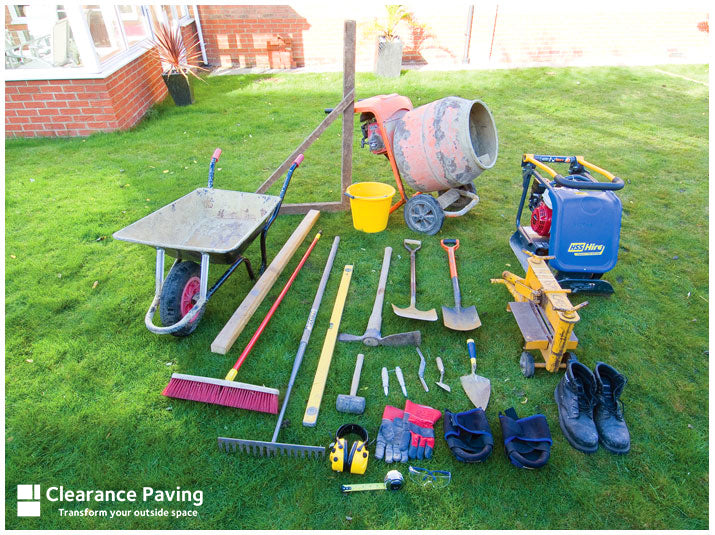
You will also need your choice of paving, building sand, washed sharp sand, cement, DTp Type 1 Sub-Base. The quantity of the materials will depend on the size of the area you are installing, so ask your local Builders Merchant who will be able to advise.
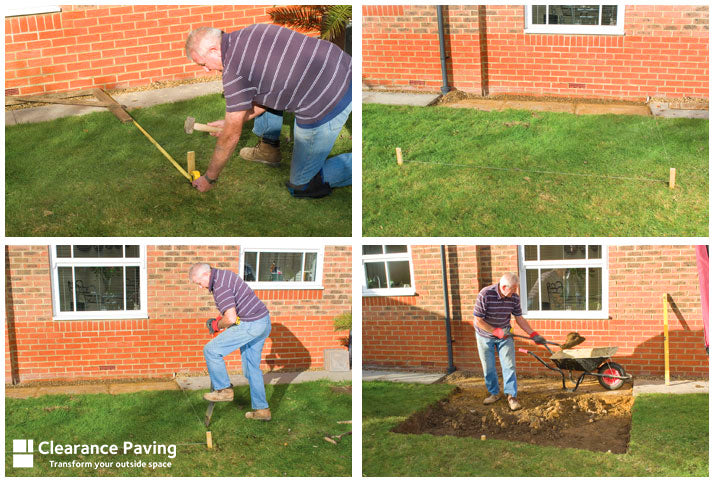
Stage 1
Arrange your materials to be stacked nearby on dry ground and allow enough room for mixing mortar nearby.
Mark out the paving area according to your plan. Clear all vegetation and remove the topsoil, consolidating and levelling the ground to a suitable depth to allow for bedding materials and the paving (Detailed later in this guide).
Remember the top surface of the paving should be at least 2 brick courses (150mm) below the level of any damp proof course when installed.
Use pegs and string line as a guide around the perimeter of the area to ensure an even finished surface and include a 1:80 fall as a drainage slope away from any buildings or fences.
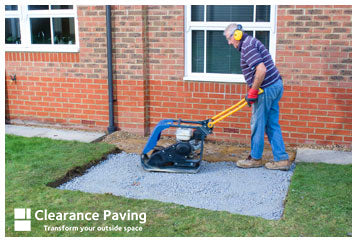
Stage 2
All paving should be laid on a firm, level base to ensure long-term stability. Lay approximately 100mm of DTp Type 1 Sub-base material and compact well to a minimum of 75mm depth.
Stage 3
We recommend either a full mortar bed or a minimum perimeter bedding with a dab in the middle when installing concrete paving slabs. Use a mortar mix of one part cement to 6 parts building sand. The depth of the mortar bed should be at least 25mm. If you are installing natural stone, lay a full mortar bed to cater for thickness variations.
Only lay a bedding area that you can use within a reasonable amount of time so it does not cure too soon.
Stage 4
Lay flags from different packs for the best overall effect of texture and colour. When positioning the paving slabs, take care with large sizes (two people working together helps to prevent the risk of injury and breakages).
Lay each slab in turn, tapping down using the rubber mallet and spirit level, maintaining the slope mentioned above. Natural stone paving should be laid with the greater surface area face up, the cut edge (chamfer), should diminish towards the ground.
We recommend a nominal joint width of 10mm on most paving. Some products can be butt-jointed, contact the manufacturer to confirm suitability.
Once all the paving is laid, leave the mortar to set and do not use the area for at approx 24 hours. Cover if rain is forecast.
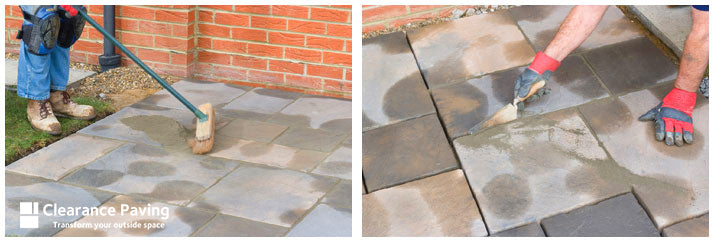
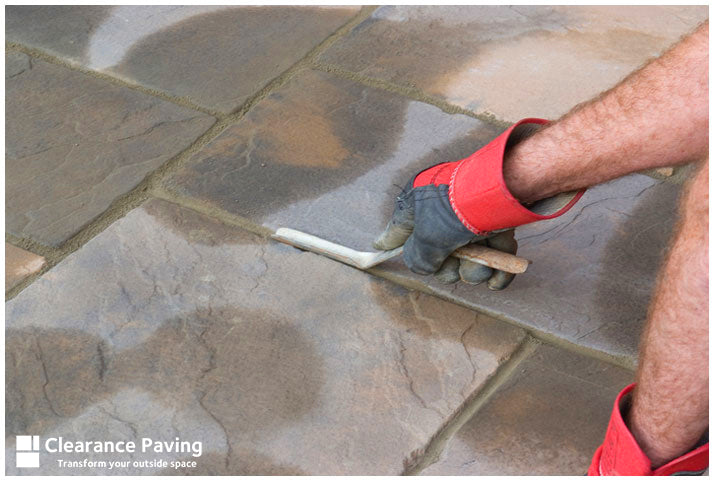
Stage 5
To finish, joints should be pointed on a dry day. This is done using an almost dry mortar mix of one part cement to four parts washed sharp and. Ensure this is thoroughly mixed.
This should be trowelled into the joints, smoothed over and then pointed either with a pointing tool or a rounded piece of wood. Clean mortar spillages immediately to prevent staining.
Tips
When laying small areas, buy project packs that feature mixed sizes. These are economical and provide a balanced mix of sizes for a traditional look.
Try to avoid joint lengths of more than 3 slabs to improve the appearance of your finished project.
If required, install edging, manhole covers and drainage channels before your main paving.
If you need to cut slabs to fit always use the correct protective equipnemt and measure carefully to avoid wastage.
Click here to download and print our Handy Guide to installation.
Hopefully you now know exactly how to install paving slabs yourself thanks to our guide.